![Read This Before Spending $700 on a Mac mini. OpenClaw Runs for Free [Complete Guide]](/images/media/openclaw-oracle/01-openclaw-top.png)
Read This Before Spending $700 on a Mac mini. OpenClaw Runs for Free [Complete Guide]
Introduction
"I bought a Mac mini just for OpenClaw" — posts like this have been going viral on social media. It makes sense: OpenClaw is an AI agent designed to run around the clock, so a dedicated machine feels like the right move.
But a Mac mini costs around $700. That's not exactly impulse-buy territory.
Here's the thing: you can run OpenClaw completely free. Oracle Cloud's "Always Free" tier gives you 4 CPU cores and 24 GB of memory — Mac mini-grade specs — at no cost, forever.
This series walks you through setting up OpenClaw safely in two parts.
| Part | What's Covered |
|---|---|
| Vol.1 (this article) | Setting up a server on Oracle Cloud's free tier |
| Vol.2 | Dashboard walkthrough, LLM configuration, Slack / LINE integration |
What Is OpenClaw? — A 2-Minute Overview
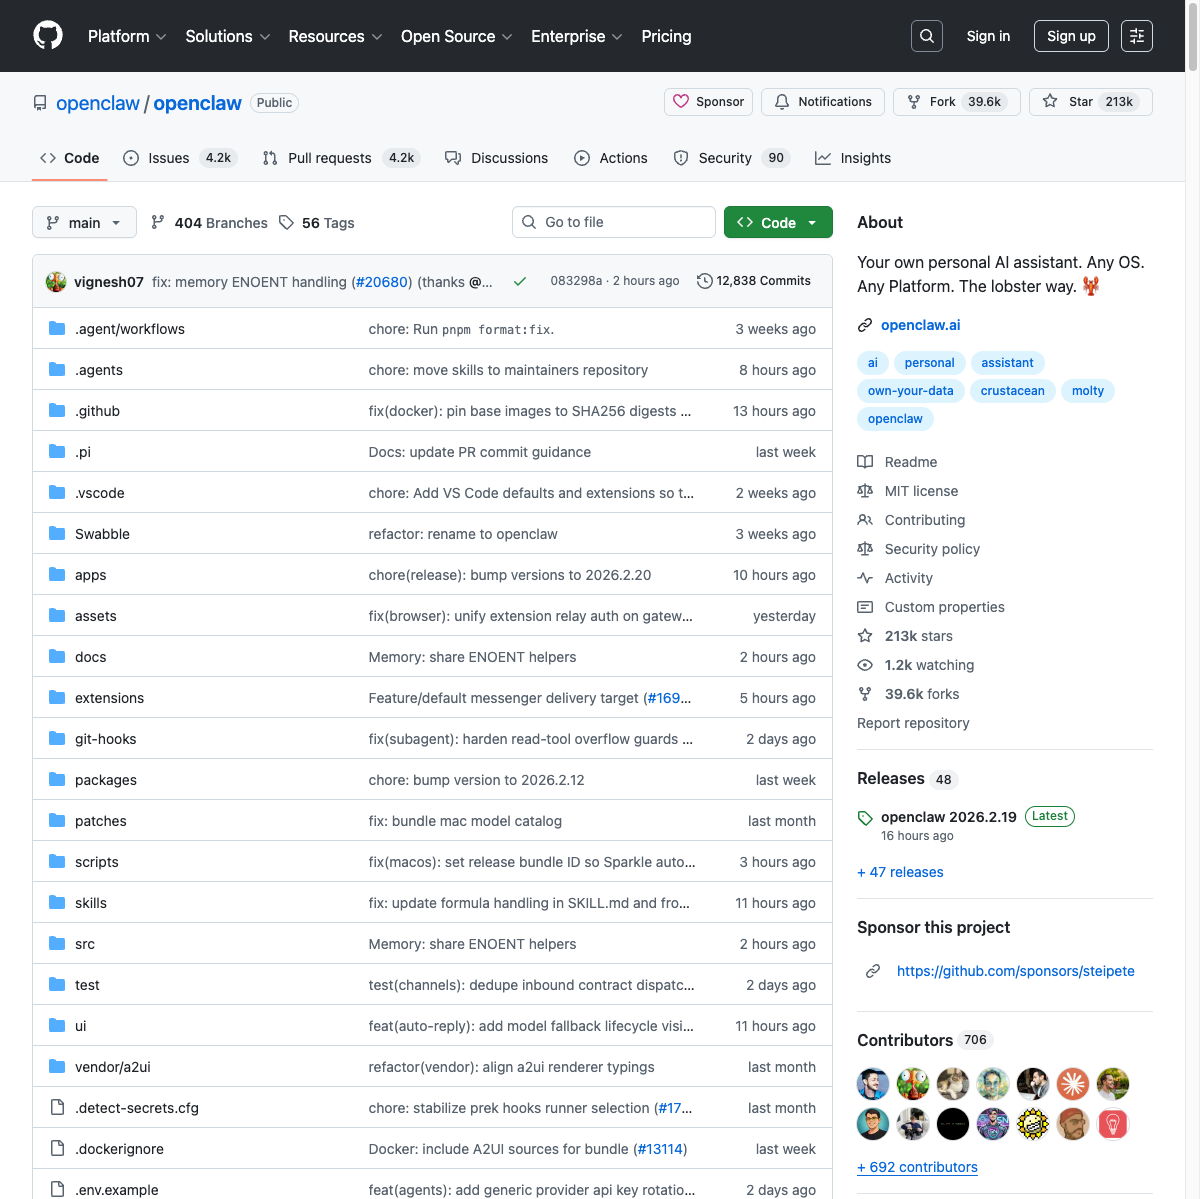
OpenClaw is an open-source AI agent released in late January 2026. It hit 210,000 GitHub stars within just two days of launch, making waves across the AI community.
It was created by Austrian developer Peter Steinberger (who joined OpenAI in February). In a nutshell, OpenClaw is "your personal AI assistant, accessible through a chat app."
Here's what it can do:
- Calendar management and reminders
- Email organization and auto-replies
- Web search and research
- File operations and document creation
The LLM (Large Language Model) is BYOK — bring your own key. You can choose from Claude, ChatGPT, DeepSeek, and others.
Why Run It on the Cloud Instead of Your Own PC?
OpenClaw is powerful, but it comes with security risks.
OpenClaw is an agent that accesses your files, email, and calendar. Cisco's security team has demonstrated that third-party Skills (extensions) can potentially exfiltrate data. Developer Peter Steinberger himself has warned that "this project is too dangerous for anyone who doesn't understand the CLI."
Running it on your main PC gives it direct access to your personal data. Even a dedicated Mac mini on the same network still leaves data exposure risks.
Running it in an isolated cloud environment is the safest approach.
Note: OpenClaw is powerful but carries security risks. This series covers how to run it safely by isolating it in the cloud.
Why Oracle Cloud's Free Tier Is Unbeatable
Let's compare free tiers across major cloud providers.
| Provider | Free Tier | Memory | CPU |
|---|---|---|---|
| Oracle Cloud | Always Free (permanent) | 24 GB | 4 cores (ARM) |
| AWS | Always Free (t2.micro) + 12-month free tier | 1 GB | 1 core |
| GCP | Always Free (e2-micro) + $300/90-day credit | 1 GB | Shared |
All three offer permanent Always Free tiers, but the specs gap is enormous. AWS's t2.micro and GCP's e2-micro top out at 1 GB of memory. Oracle Cloud gives you Mac mini-level 24 GB under Always Free.
Note: Oracle Cloud's Always Free tier conditions are as of February 2026. Cloud provider free tiers may change — check the official page for the latest information.
That said, there are some caveats worth mentioning:
- Popular regions may have no availability (more on this later)
- Instances idle for 7 days may be reclaimed (preventable by upgrading to Pay As You Go — the free tier is preserved)
Step 1: Sign Up for Oracle Cloud
Creating Your Account
Go to the Oracle Cloud free tier page.
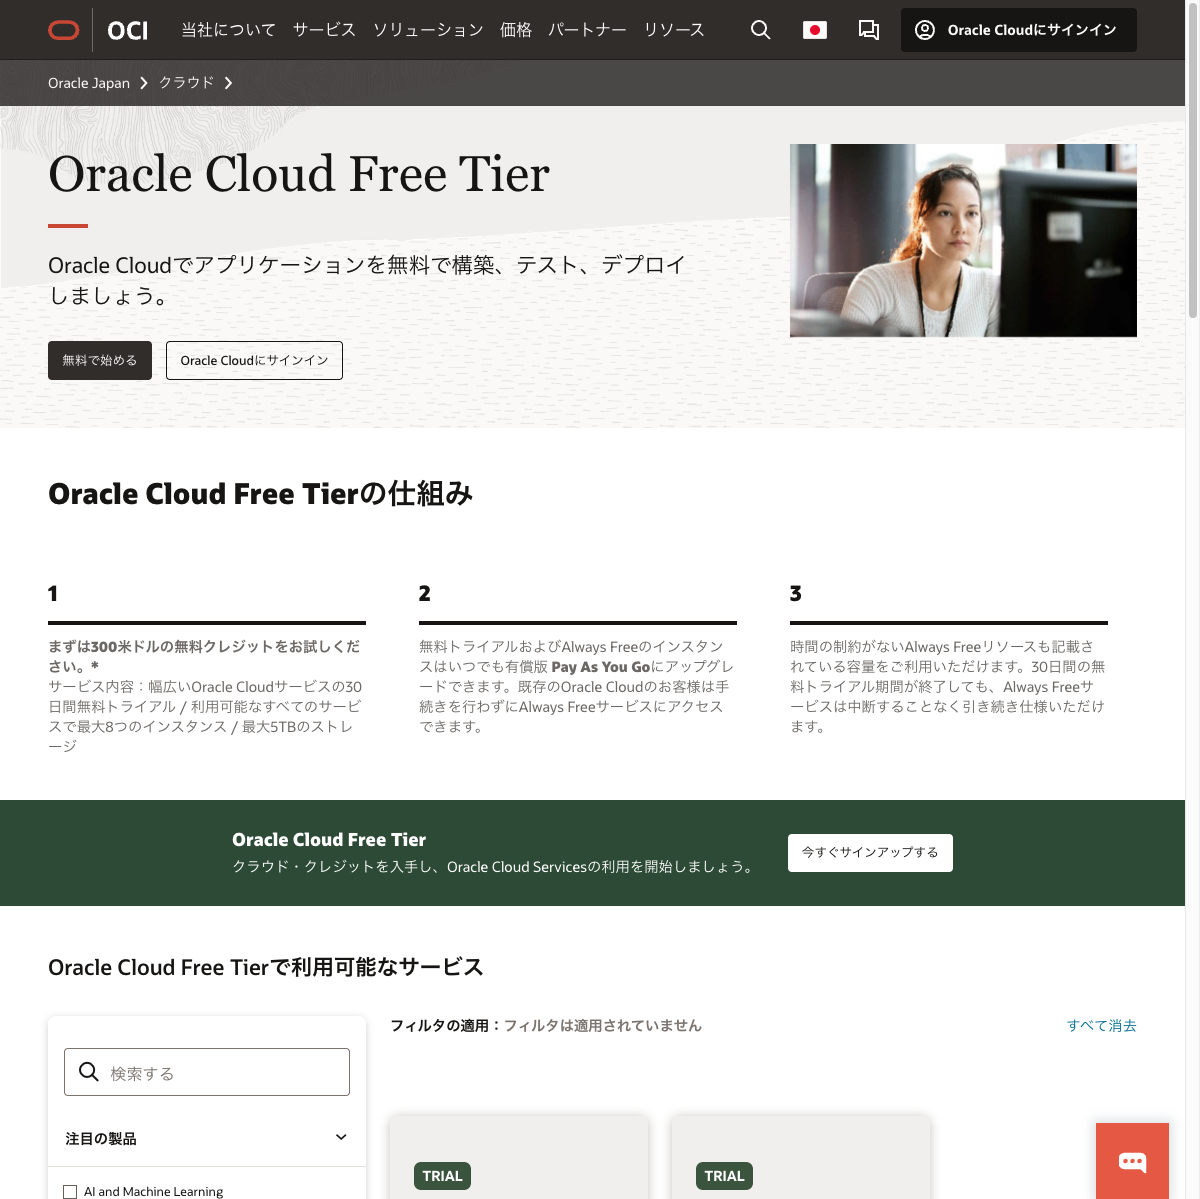
Click "Start for free" and proceed to the account creation form.
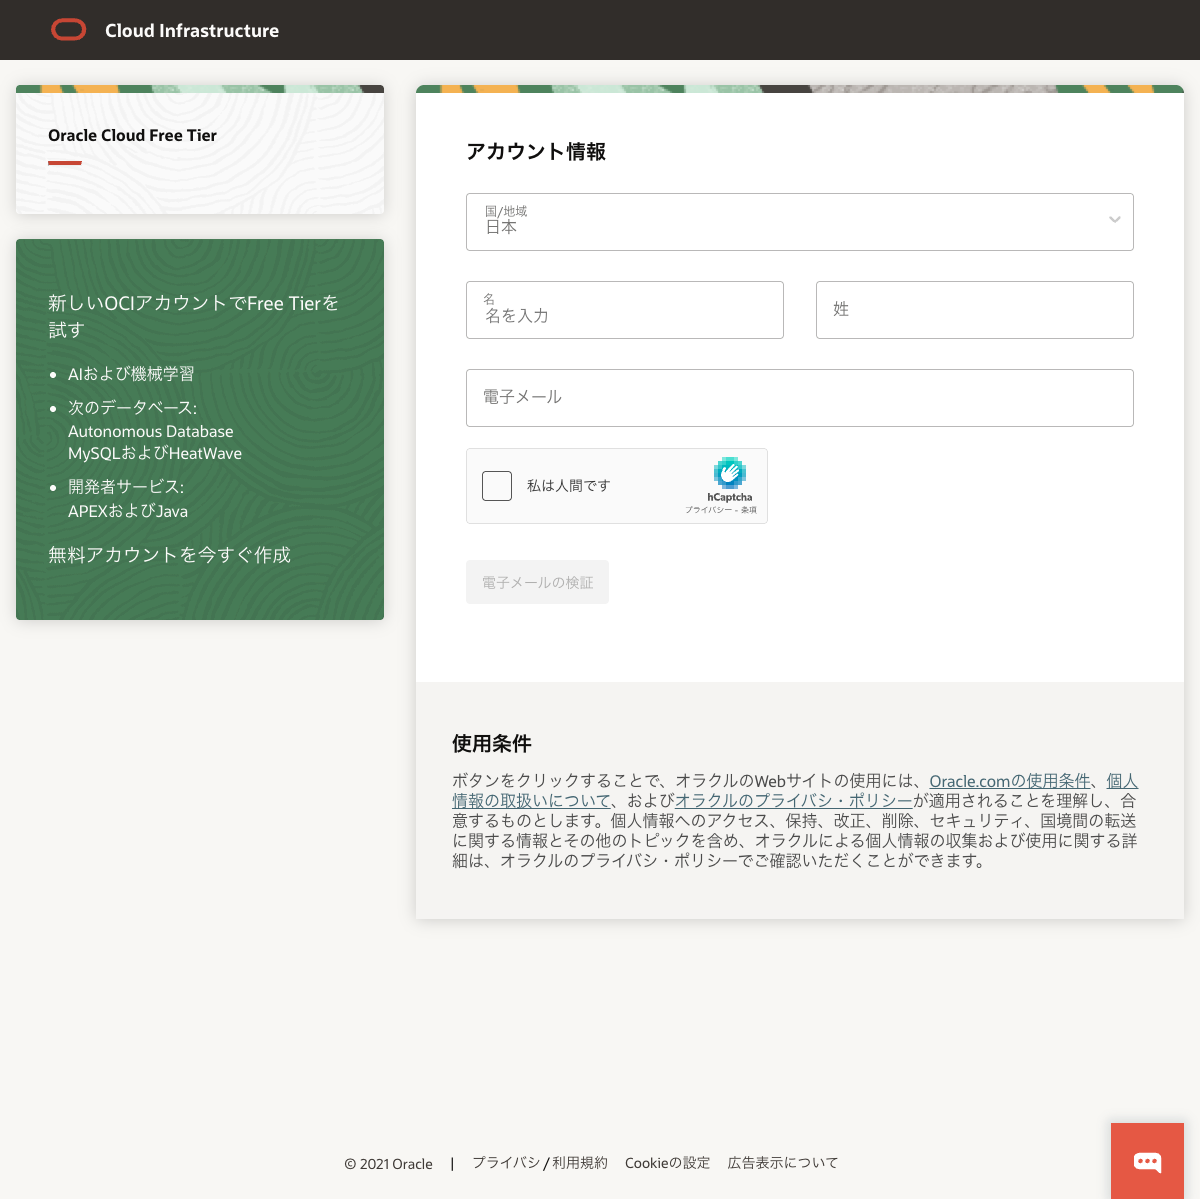
Information required:
- Name and email — You'll need to verify your email, so use an address you can access
- Password — Set according to Oracle's requirements
- Credit card — For identity verification only; you won't be charged within the free tier
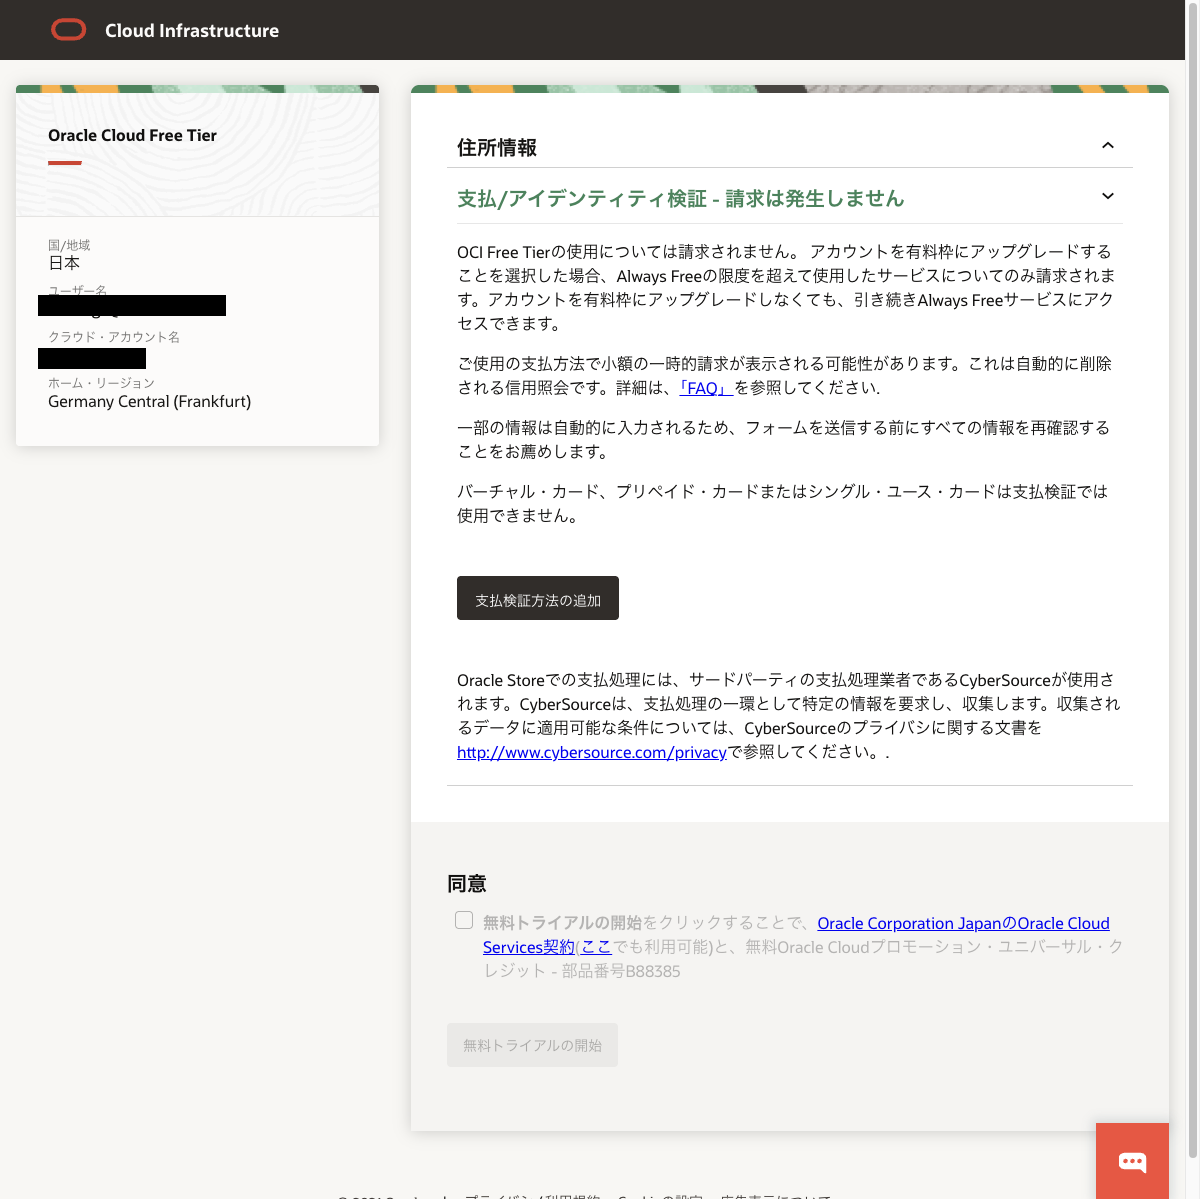
Choosing the Right Region
You'll select a home region during account creation. This cannot be changed later, so choose carefully.
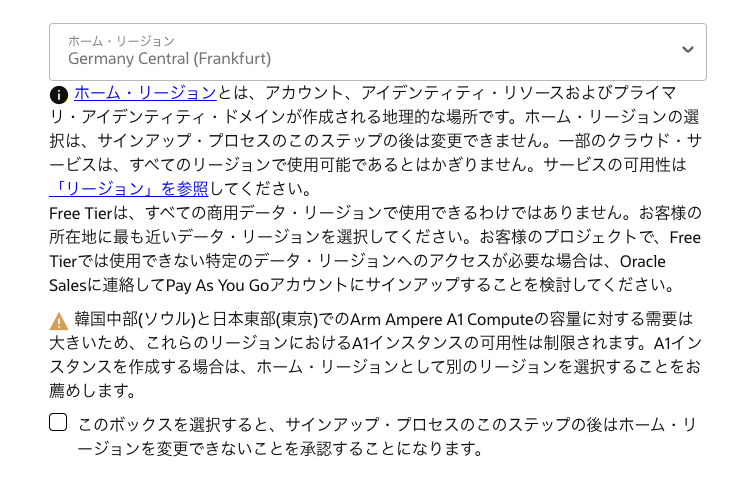
Tips for choosing:
- Tokyo (ap-tokyo-1) — Closest for Japan-based users, but highly contested with frequent unavailability
- Osaka (ap-osaka-1) — More likely to have availability than Tokyo
- Frankfurt (eu-frankfurt-1) — Reportedly has better availability among European regions
I chose Frankfurt based on community recommendations, but it turned out to be quite a struggle (more on this below).
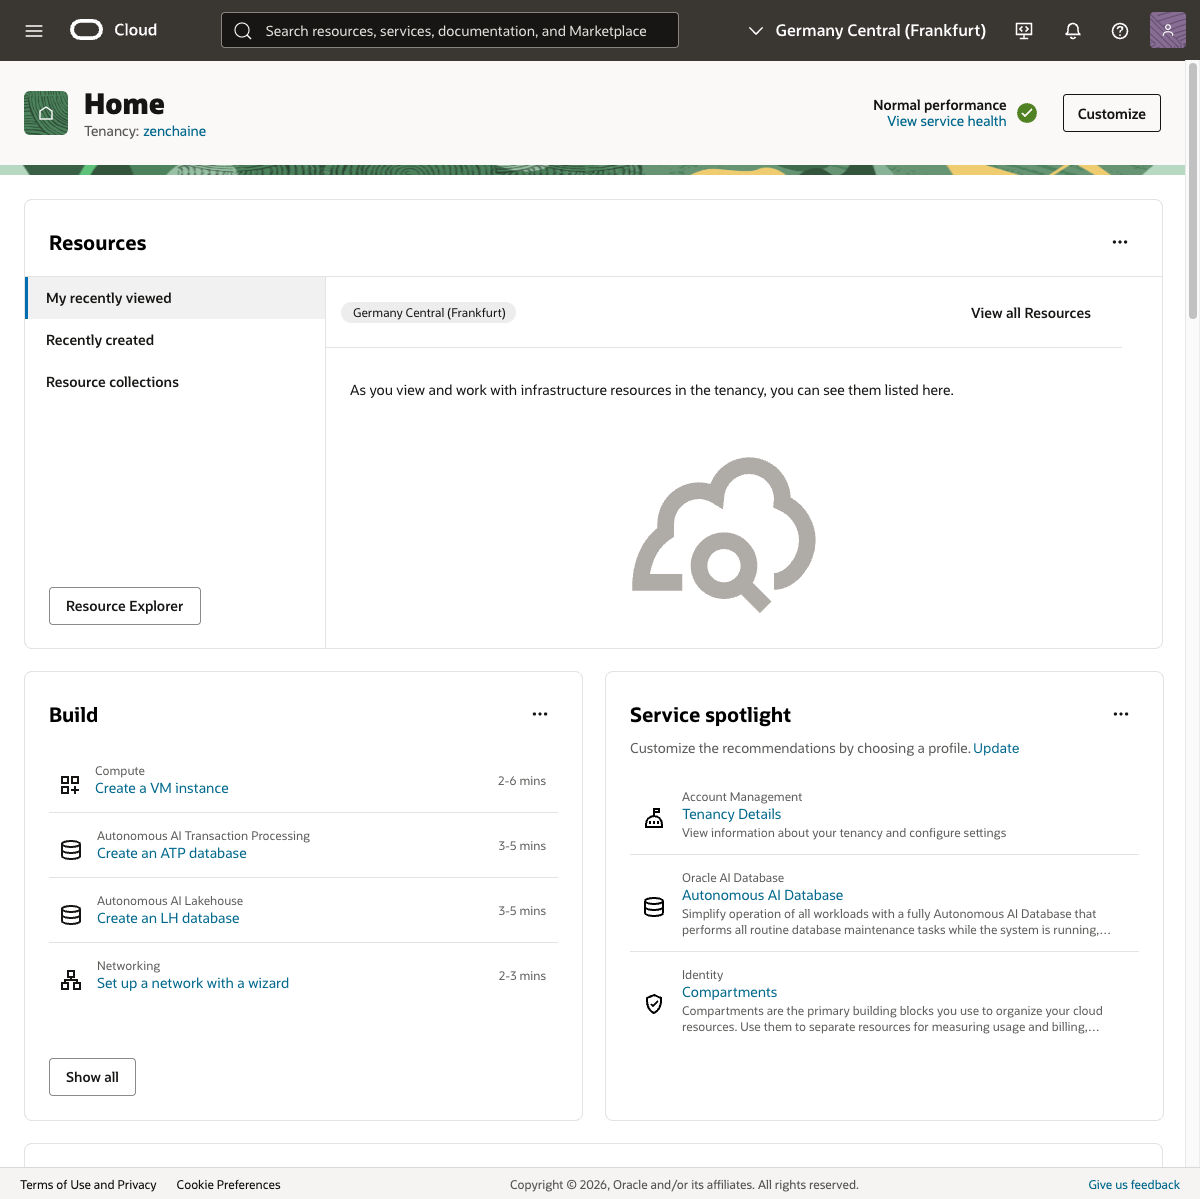
Once account creation is complete, you'll see the dashboard.
Step 2: Create a Free Instance
From the dashboard, navigate to Compute > Instances > Create instance.
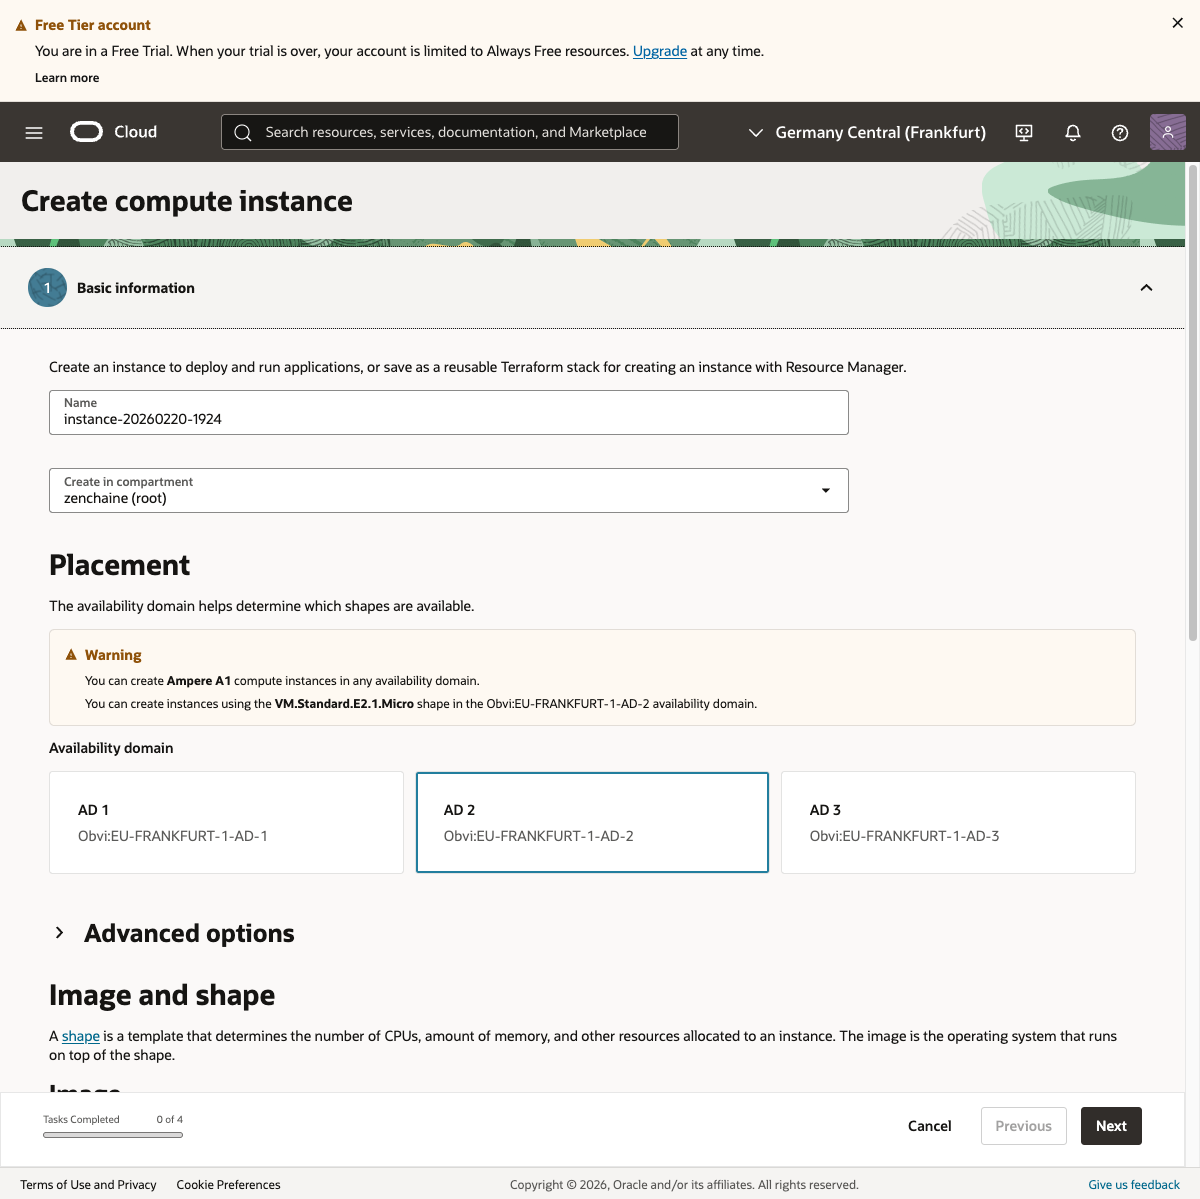
Selecting the Shape
Click "Change shape" and select the Ampere tab.
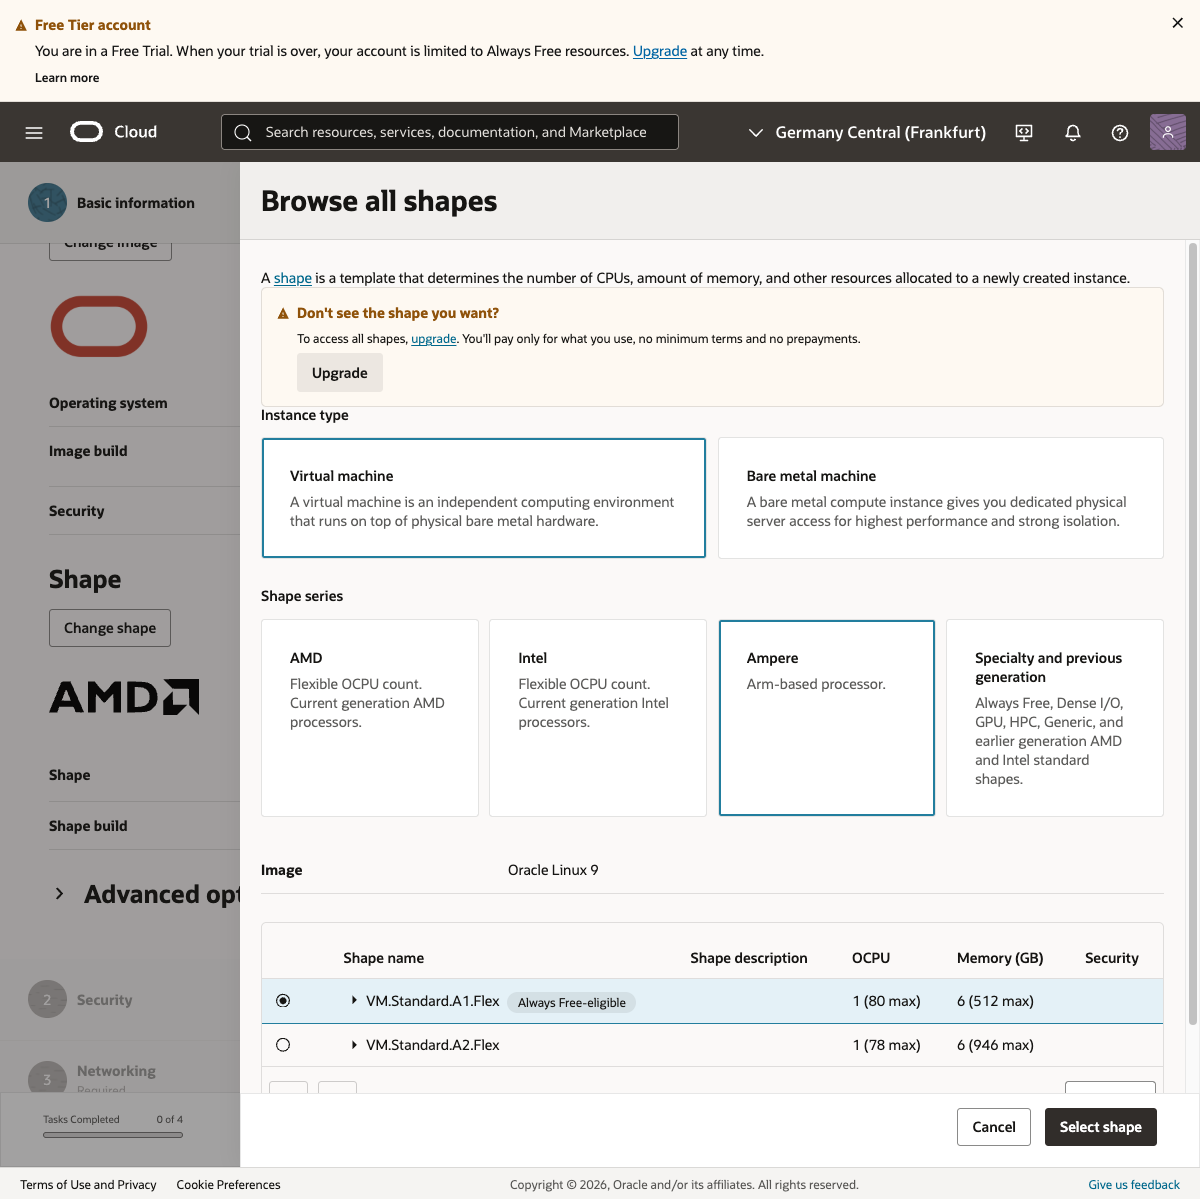
Choose VM.Standard.A1.Flex and configure as follows:
- OCPU: 4 (free tier maximum)
- Memory: 24 GB (set automatically)
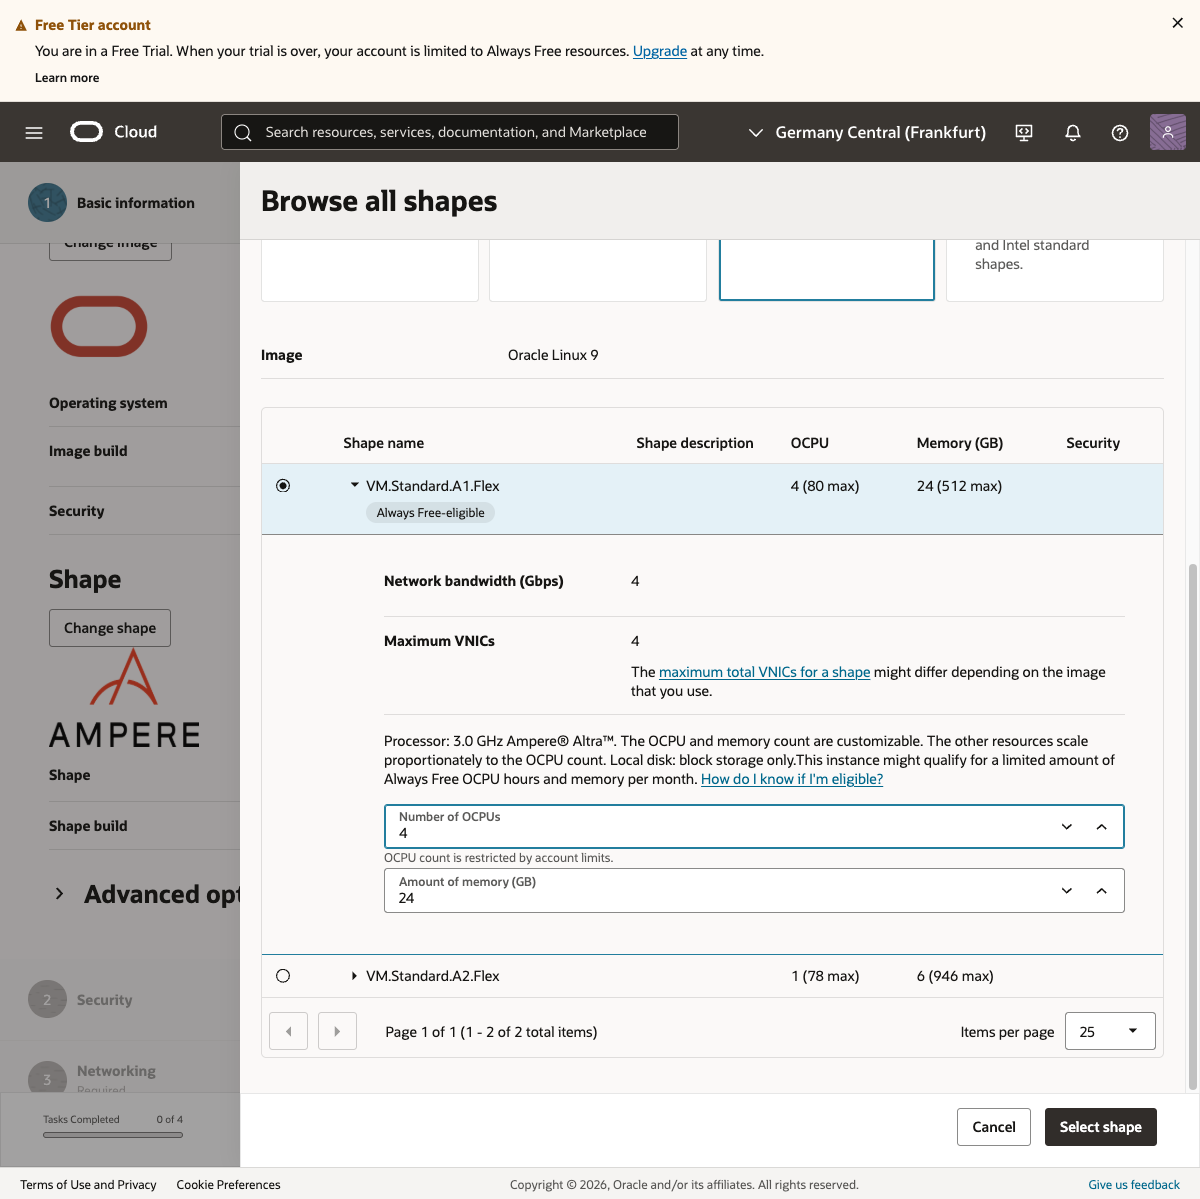
This is the maximum spec available under the free tier. It actually has more memory than a base M2 Mac mini (8 GB model).
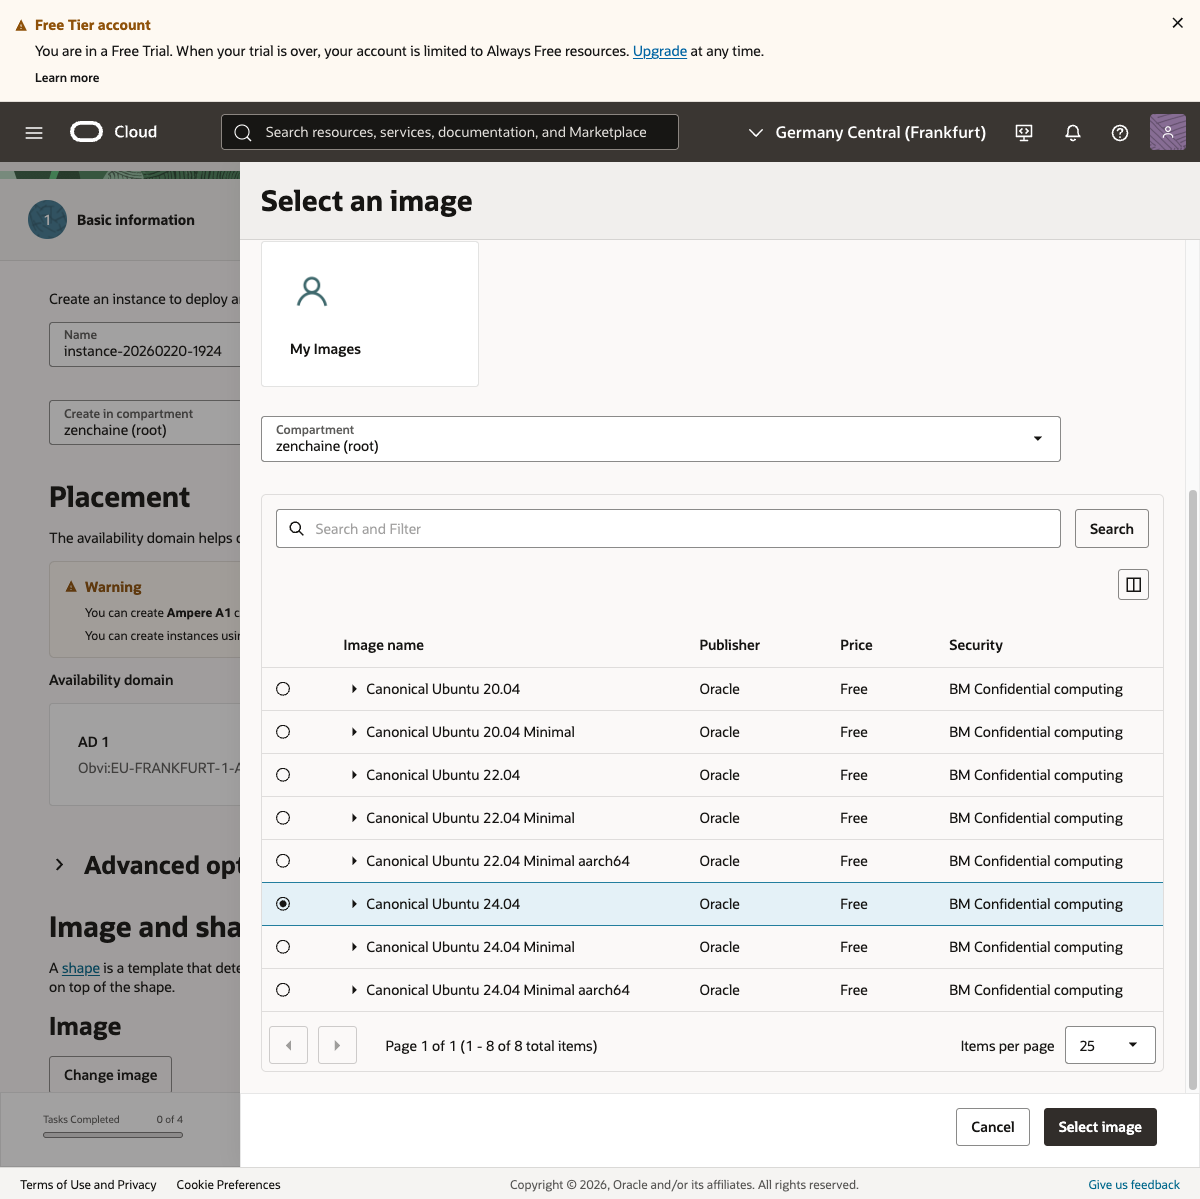
Selecting the OS
Click "Change image" and select Canonical Ubuntu 24.04.
SSH Key Setup
SSH keys are digital credentials for secure server login.
Select "Generate a key pair" and download both the private and public keys. You'll need the private key to connect to the server later. Never share it with anyone.
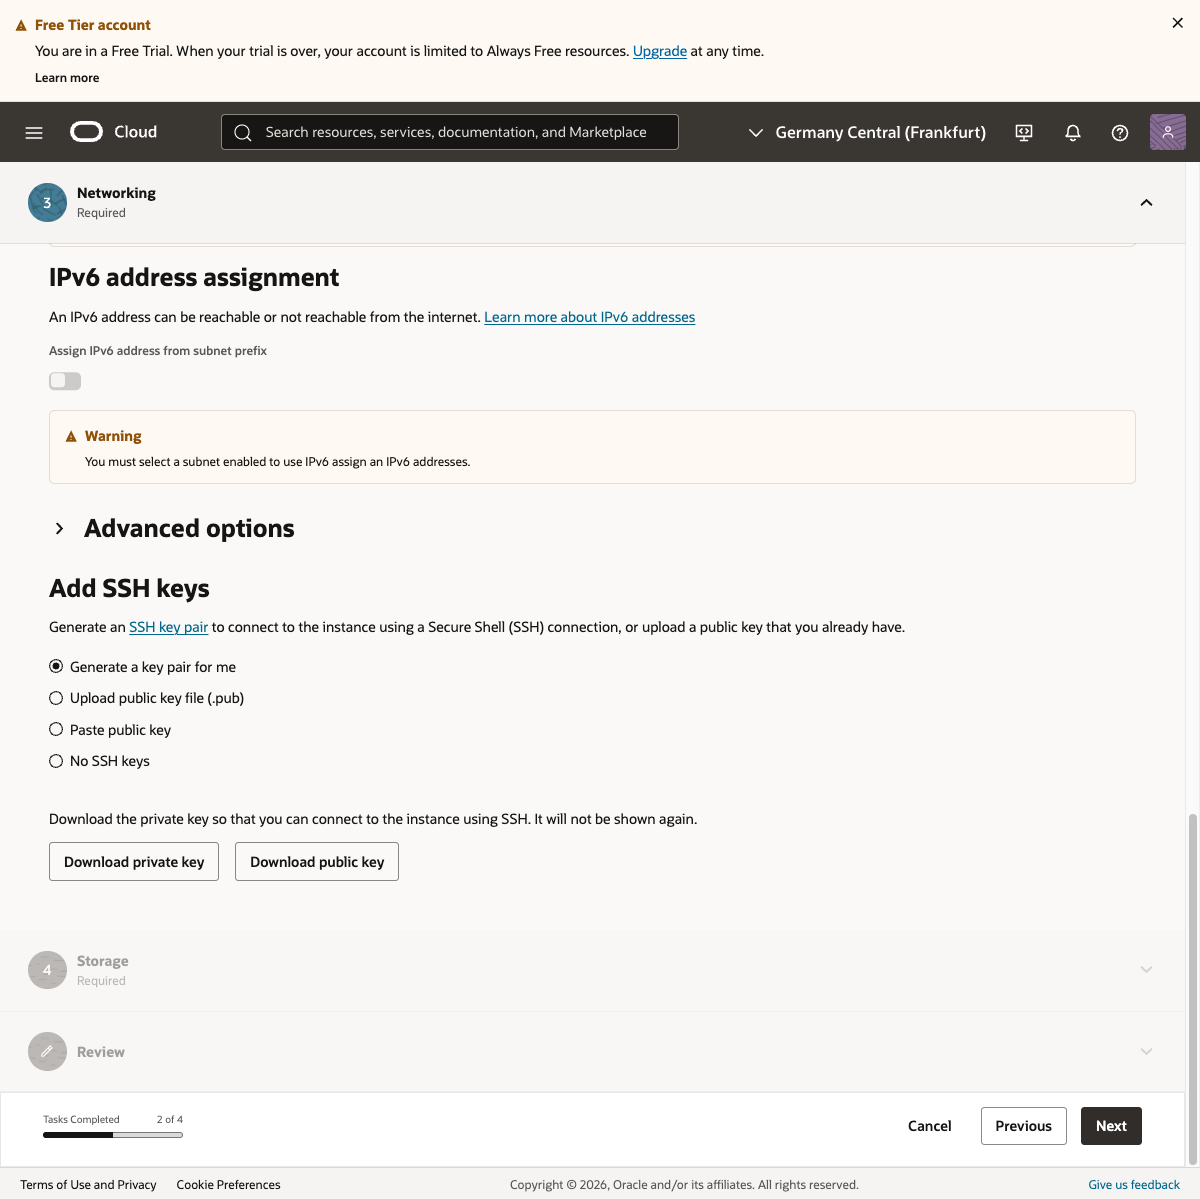
Important: The private key (.key file) cannot be re-downloaded. Make sure to download it on this screen and store it in a safe location.
Clicking "Create"... But There's a Problem
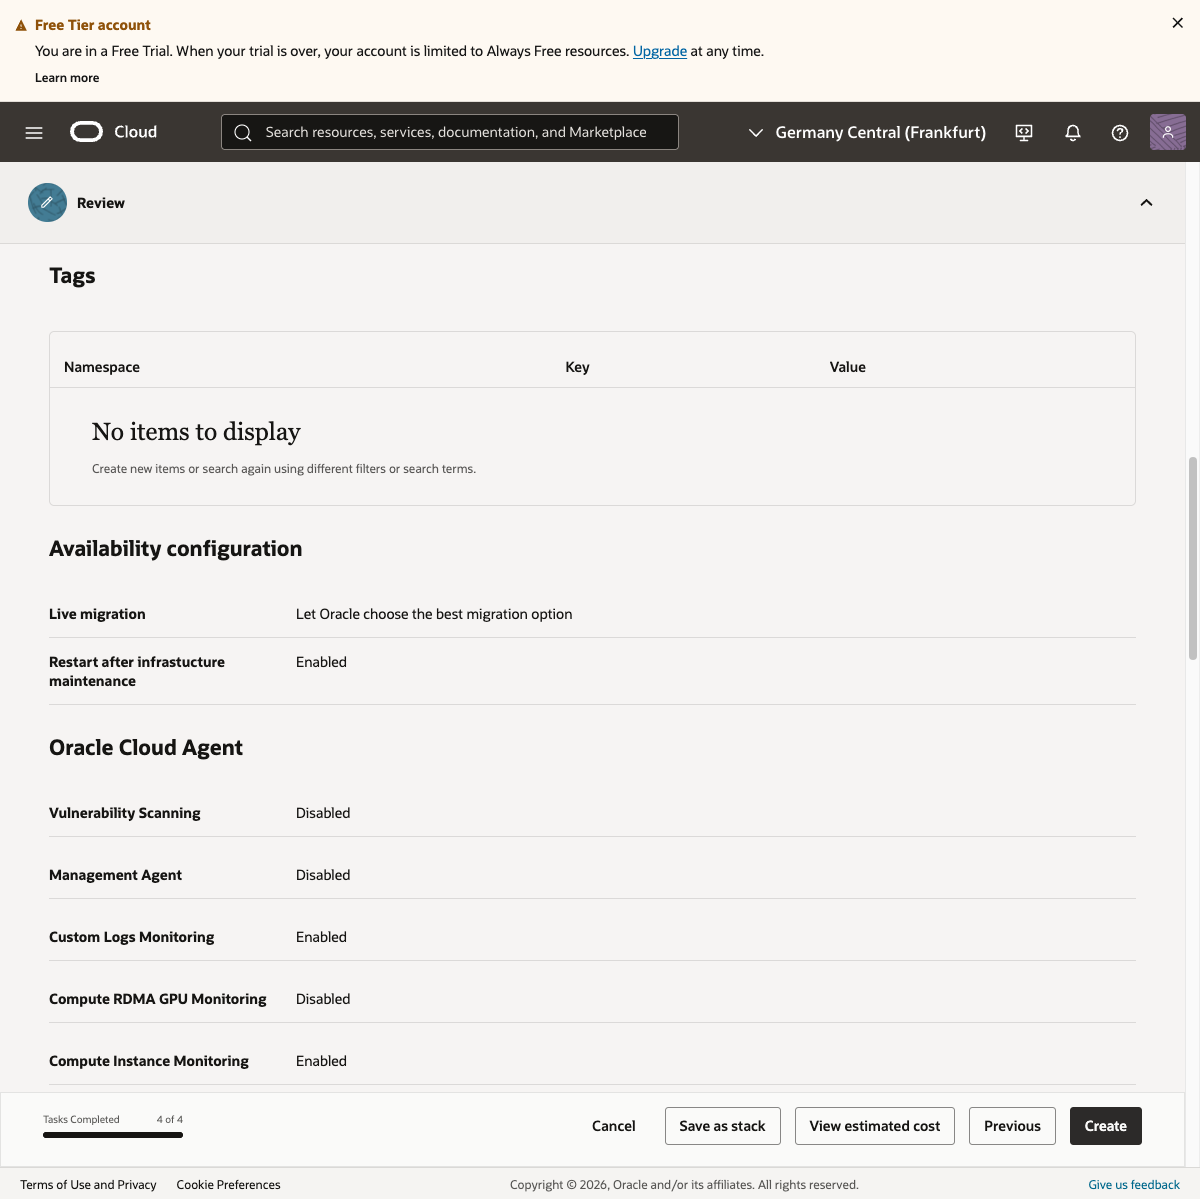
Review your settings and click "Create." Then —
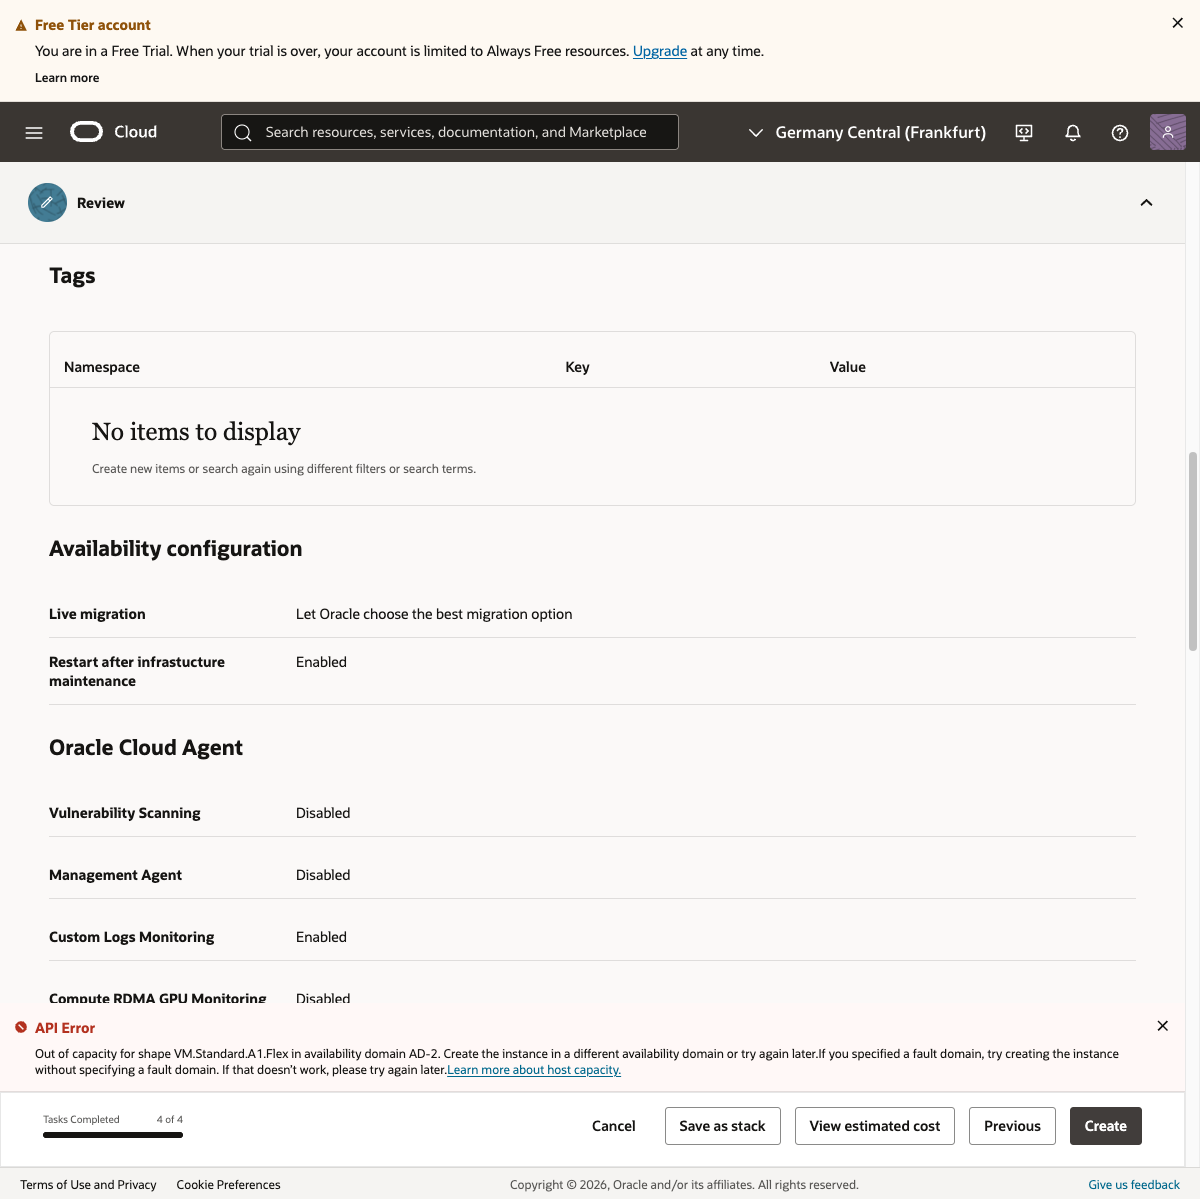
"Out of capacity." No availability.
This is a well-known issue with Oracle Cloud's free tier. Free ARM instances are extremely popular, and in-demand regions are perpetually full.
My Experience: Frankfurt Was Full Too
I chose the Frankfurt region after reading online that it had better availability. Reality was harsh.
- AD-1 (Availability Domain 1): Out of capacity
- AD-2: Out of capacity
- AD-3: Out of capacity
All three Availability Domains were full. I retried at different times (targeting local late-night hours) with no luck.
The "Out of capacity" problem is the biggest hurdle with Oracle Cloud's free tier. But there's a solution — the Pay As You Go upgrade covered in the next step.
Step 3: Upgrade to Pay As You Go
Why Upgrade?
Oracle Cloud's official FAQ states:
Pay As You Go users have priority for instance launches.
In other words, Free Tier users are constantly outprioritized by PAYG users. This is one reason why retries never seem to work.
Benefits of upgrading to PAYG:
- Priority for instance creation — First in line when capacity becomes available
- No idle reclamation — Free Tier instances may be reclaimed after 7 days of inactivity; PAYG removes this risk
- Always Free resources remain free — Upgrading to PAYG does not change the pricing of Always Free resources
Important: Even after upgrading to PAYG, resources within the Always Free tier remain completely free. Charges only apply if you use resources beyond the Always Free limits.
How to Upgrade
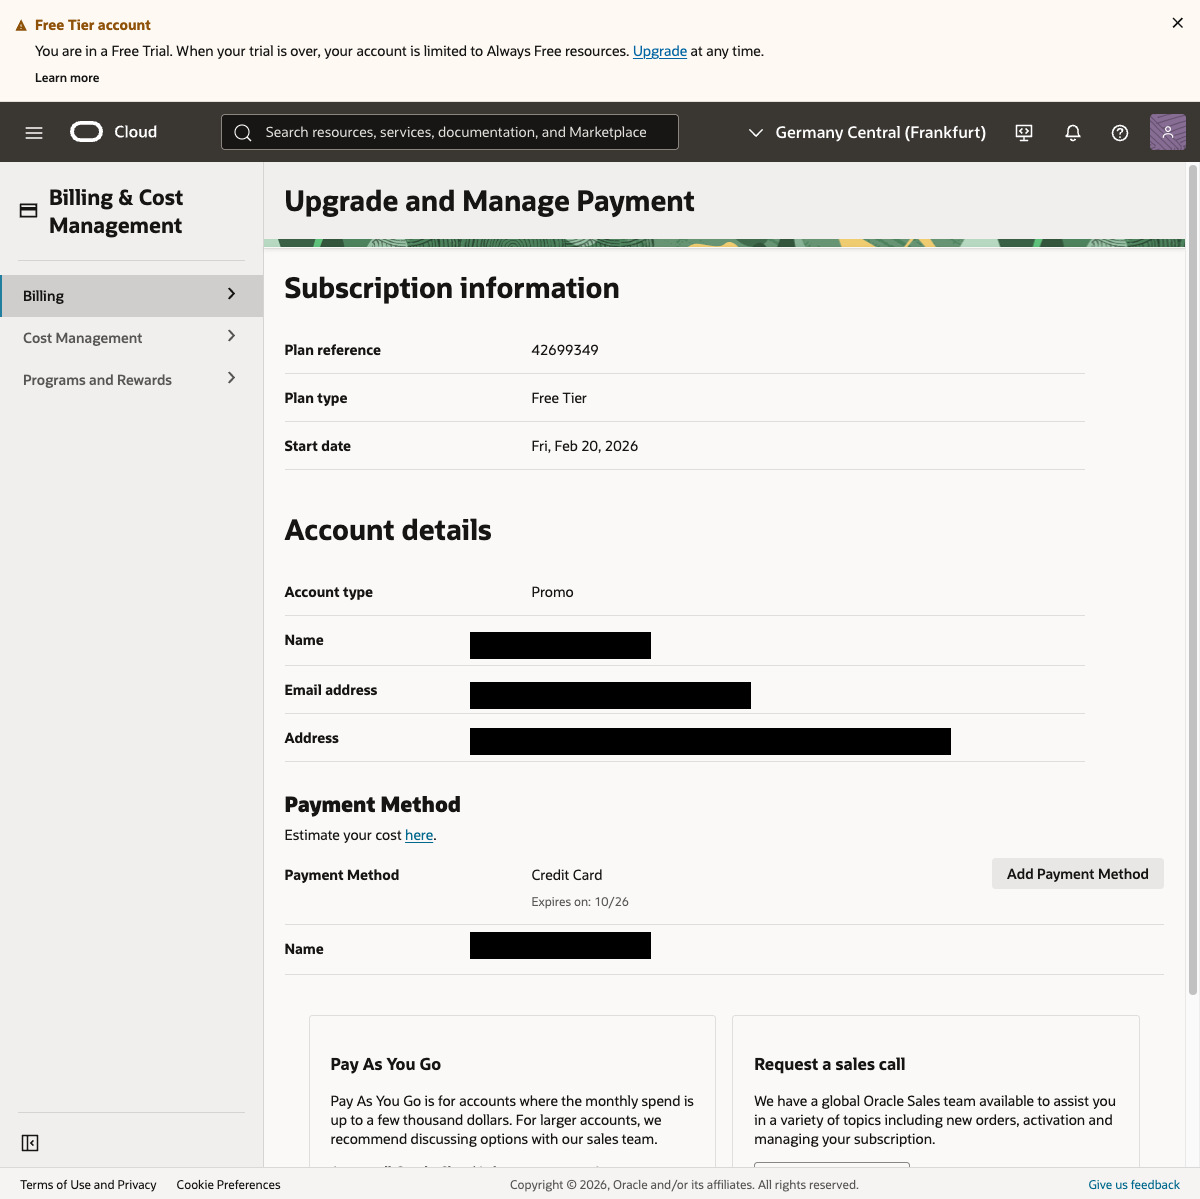
Click the "Upgrade" link in the "Free Tier account" banner at the top of the dashboard.
The "Upgrade and Manage Payment" page appears.
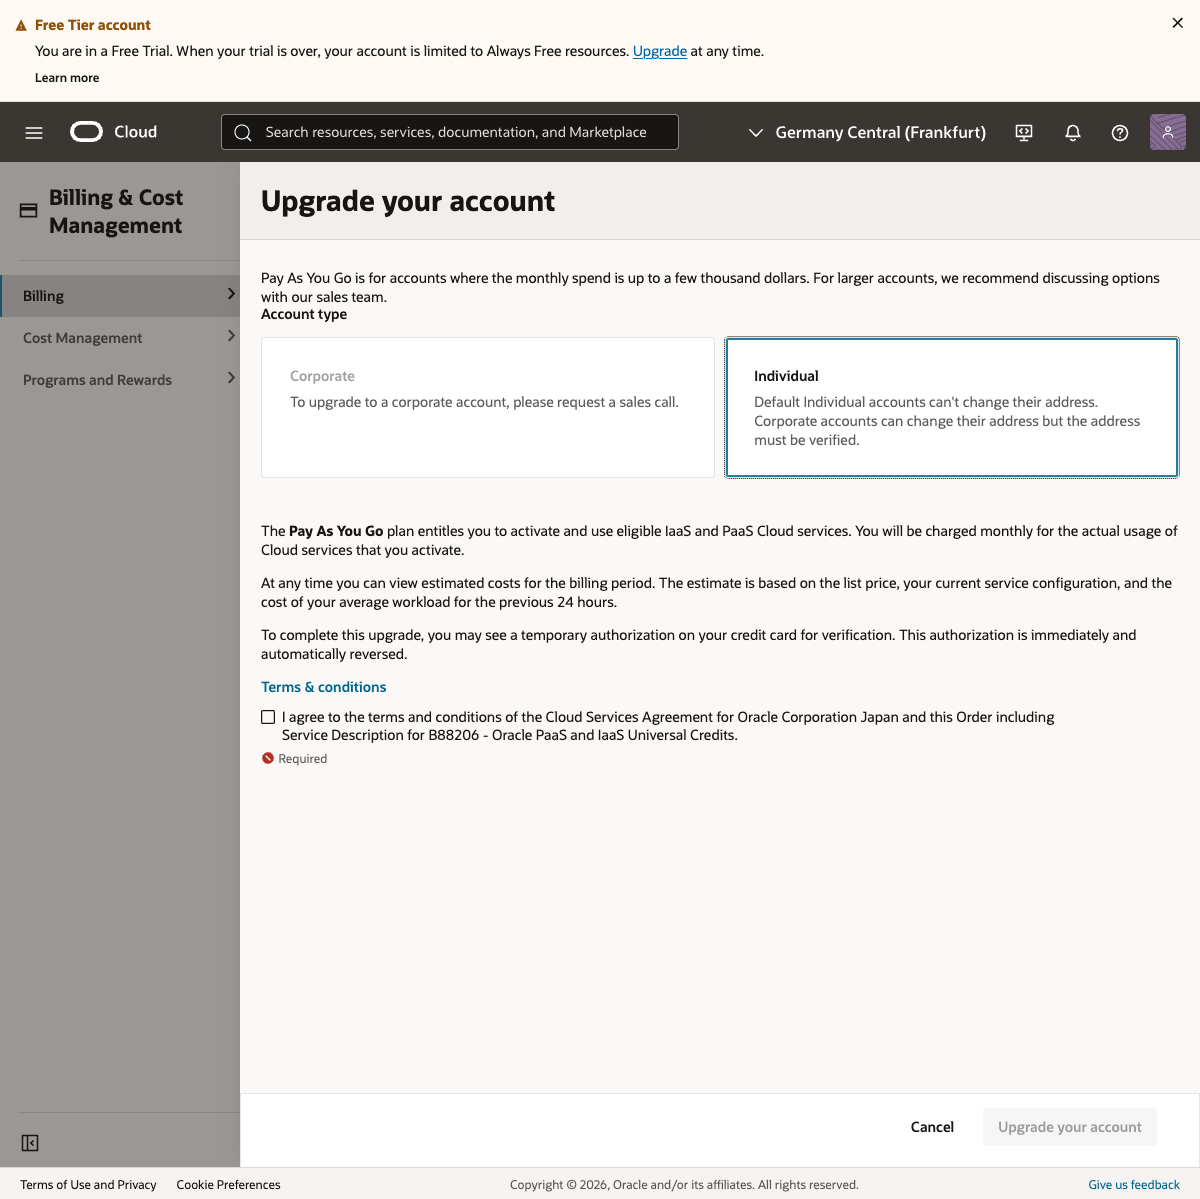
Click the "Upgrade your account" button in the "Pay As You Go" section. Confirm the dialog and agree to the terms to proceed.
The upgrade process begins.
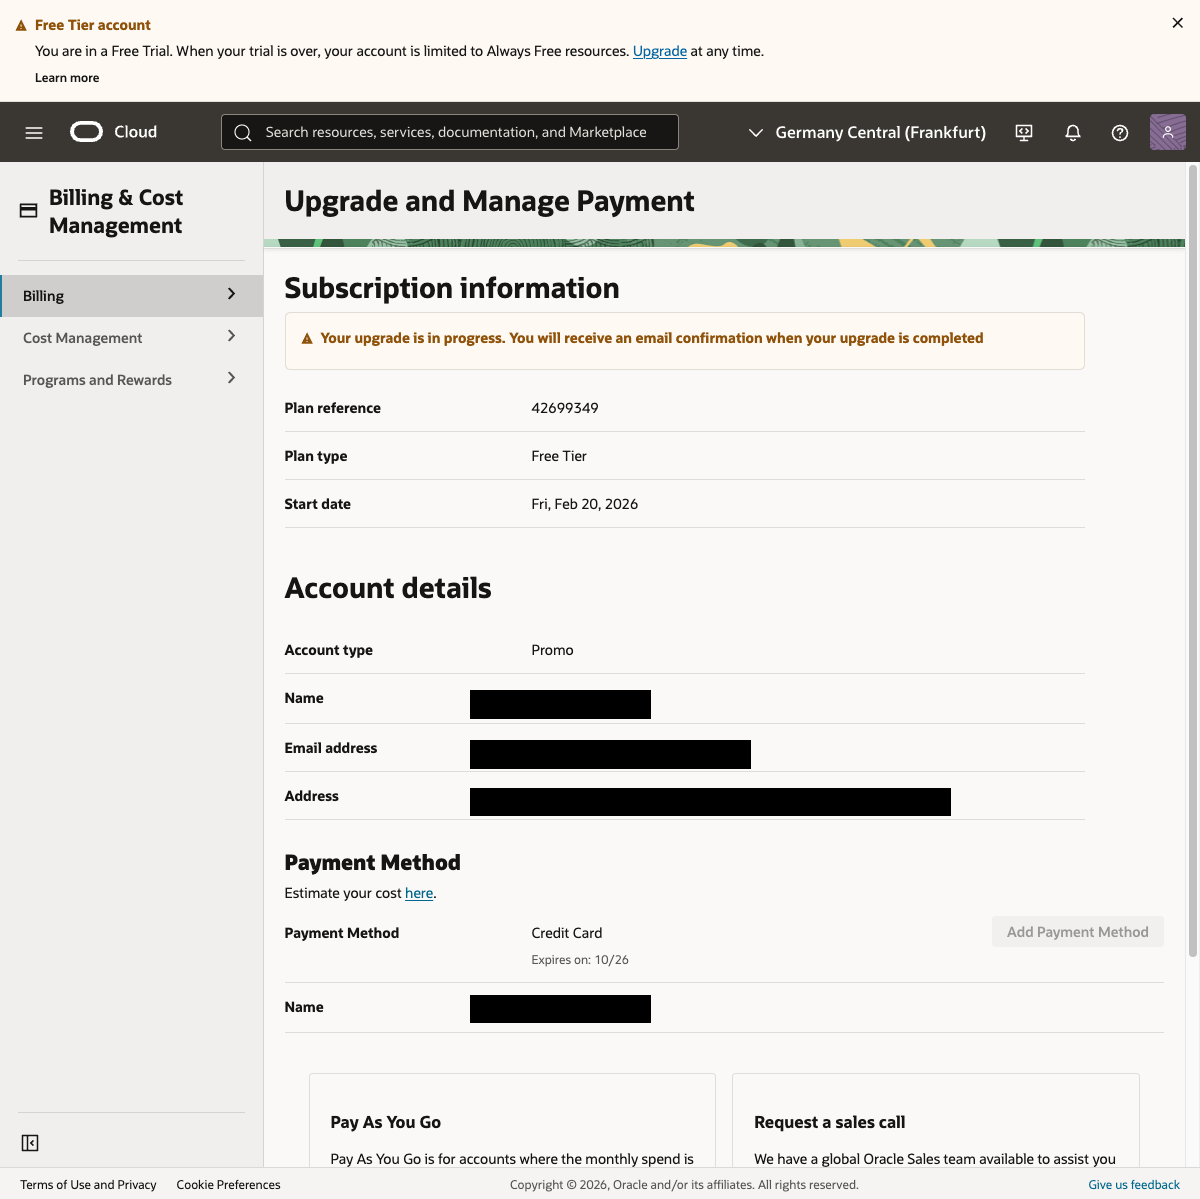
"Your upgrade is in progress" will display. The upgrade takes some time to complete (in my case, several hours to half a day). You'll receive an email notification when it's done.
Tip: During the upgrade process, you're still on the Free Tier, so instance creation won't be prioritized yet. Wait for the confirmation email.
Step 4: Set Up a Budget Alert (Peace of Mind)
After upgrading to PAYG, set up a budget alert to guard against unexpected charges. You won't be billed within the Always Free tier, but an alert provides extra peace of mind.
In the Oracle Cloud Console, navigate from the left menu to "Billing & Cost Management" > "Budgets".
Click "Create Budget" and configure as follows:
- Name:
free-tier-alert(or any name you like) - Target Compartment: root (default)
- Monthly Budget Amount:
1(USD $1) - Alert Rule:
- Threshold: 80% (notification at $0.80)
- Type: Actual Spend
- Email: Your email address
This way, if you accidentally use resources beyond the Always Free tier, you'll get an email notification at $0.80.
Note: Budget alerts are "notification only" — they don't automatically stop resources. If you receive a notification, delete unnecessary resources to stop charges. As long as you're only using Always Free resources, you'll never receive a notification.
Step 5: Retry Instance Creation
Once the PAYG upgrade is complete (check for the email notification), retry instance creation using the same settings from Step 2.
Same configuration:
- Shape: VM.Standard.A1.Flex
- OCPU: 4, Memory: 24 GB
- OS: Canonical Ubuntu 24.04
- SSH key: Use the key saved in Step 2
PAYG users get priority for instance creation, so your chances of success are much higher than on the Free Tier. If capacity is still unavailable, try different ADs (AD-1 > AD-2 > AD-3) in sequence.
In my case, the very first retry after the PAYG upgrade succeeded instantly. Provisioning started and hit "Running" status in about 30 seconds. After countless "Out of capacity" failures on the Free Tier, it felt almost unreal.

Check the details of your newly created instance.
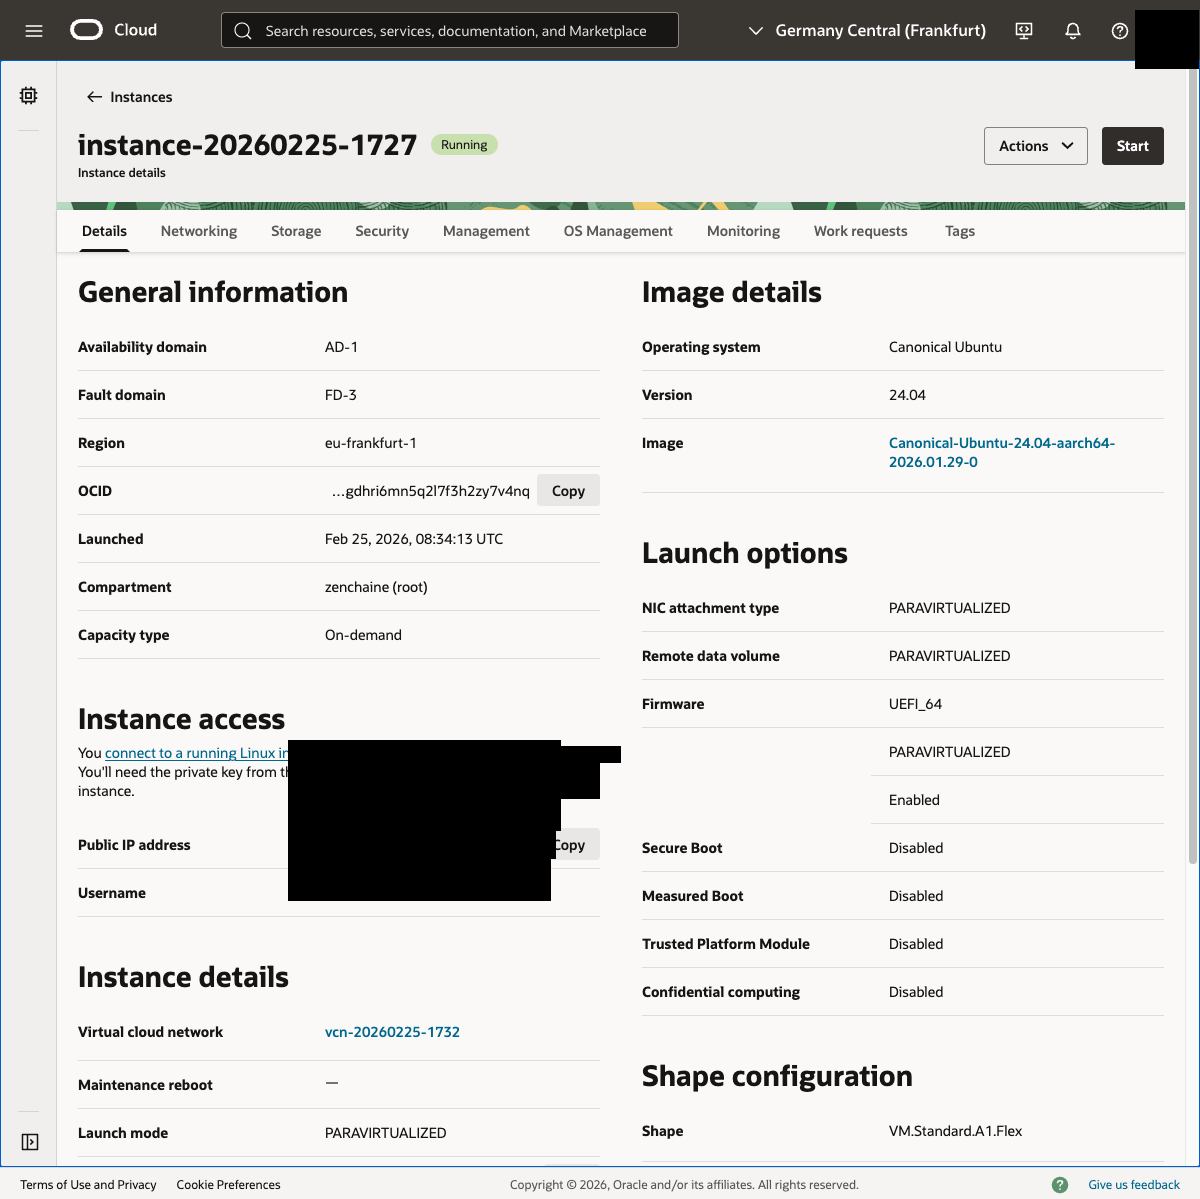
- Status: Running
- Availability Domain: AD-1
- Shape: VM.Standard.A1.Flex (4 OCPU, 24 GB Memory)
- OS: Canonical Ubuntu 24.04 (aarch64)
- Public IP: Assigned
- Username: ubuntu
Note: If a public IP isn't automatically assigned during instance creation, you can manually assign an "Ephemeral public IP" from the instance's "Networking" tab > VNIC > "IP administration."
Step 6: Connect via SSH
With the instance created, connect to the server via SSH.
Check the Public IP Address
The public IP address and username are shown in the "Instance access" section of the instance details page.
Note: Oracle Cloud's default user is
ubuntu, notroot. Attempting to connect asrootwill fail.
Place the SSH Key in the Right Location
Move the downloaded private key to ~/.ssh/ and set the proper permissions.
# Move and rename the private key
mv ~/Downloads/ssh-key-*.key ~/.ssh/openclaw-oracle

# Set permissions (readable by owner only)
chmod 600 ~/.ssh/openclaw-oracle
Why
~/.ssh/? Leaving keys in~/Downloads/is a security concern.~/.ssh/is the standard location for SSH keys, with permissions managed to prevent access by other users.
Configure SSH Config
Adding connection details to ~/.ssh/config saves you from typing long commands every time. Append the following (create the file if it doesn't exist).
Host openclaw-oracle
    HostName <PUBLIC_IP_ADDRESS>
    Port 22
    User ubuntu
    IdentityFile ~/.ssh/openclaw-oracle
    IdentitiesOnly yes
Replace <PUBLIC_IP_ADDRESS> with the IP address from your instance details page.
Also verify the config file permissions.
chmod 600 ~/.ssh/configConnect
With everything configured, connecting is a single command.
ssh openclaw-oracleOn first connection, you'll be asked "Are you sure you want to continue connecting?" — type yes.
Once connected, you can verify the server specs.
ubuntu@openclaw:~$ uname -a
Linux openclaw 6.14.0-1018-oracle aarch64 GNU/Linux

ubuntu@openclaw:~$ free -h
               total        used        free
Mem:            23Gi       901Mi        21Gi

ubuntu@openclaw:~$ df -h /
Filesystem      Size  Used Avail Use%
/dev/sda1        45G  2.7G   42G   6%
23 GB of memory and 42 GB of free storage. More than enough — no Mac mini required.
Tip: From here on, all commands assume you're connected via
ssh openclaw-oracle. Having SSH config set up also makes the SSH tunnel in the next step much simpler.
Step 7: Install OpenClaw
With SSH access established, it's time to install OpenClaw.
System Updates
Start by bringing the system up to date.
sudo apt update && sudo apt upgrade -y
sudo apt install -y build-essential
build-essential is needed for compiling certain dependencies on the ARM architecture.
Installing OpenClaw
curl -fsSL https://openclaw.ai/install.sh | bash
source ~/.bashrc
The installer handles everything from Node.js installation to the OpenClaw binary.
Verify the installation by checking the version.
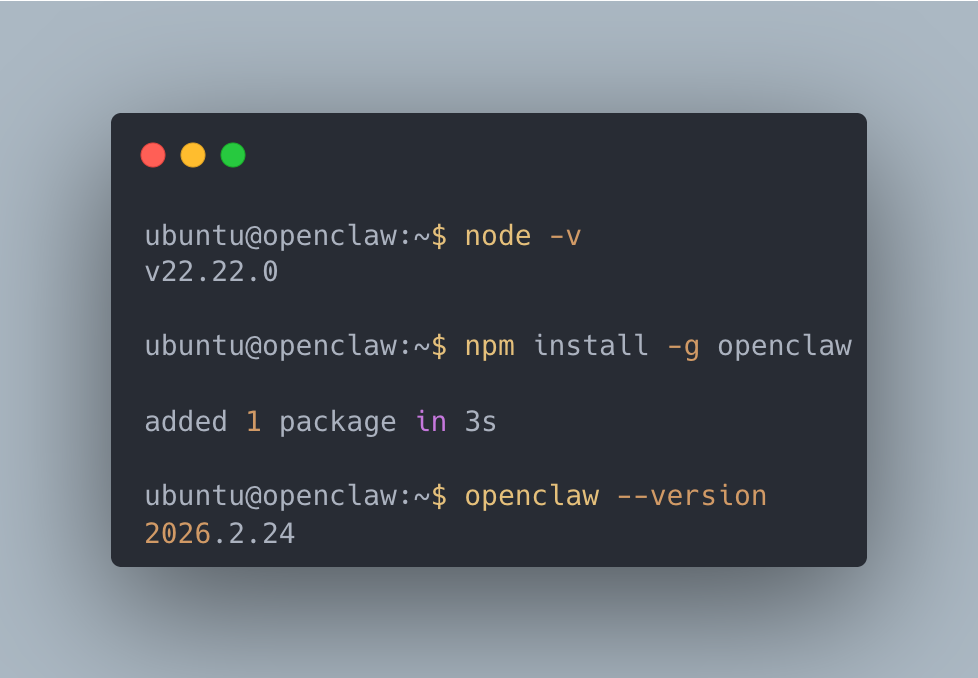
If openclaw --version displays a version number, the installation was successful.
Gateway Configuration and Startup
Configure the OpenClaw Gateway (the communication hub for the AI agent).
# Set the hostname
sudo hostnamectl set-hostname openclaw
# Enable service persistence after logout
sudo loginctl enable-linger ubuntu
# Basic Gateway configuration
openclaw config set gateway.mode local
openclaw config set gateway.bind loopback
openclaw config set gateway.auth.mode token
# Generate an authentication token
openclaw doctor --generate-gateway-token
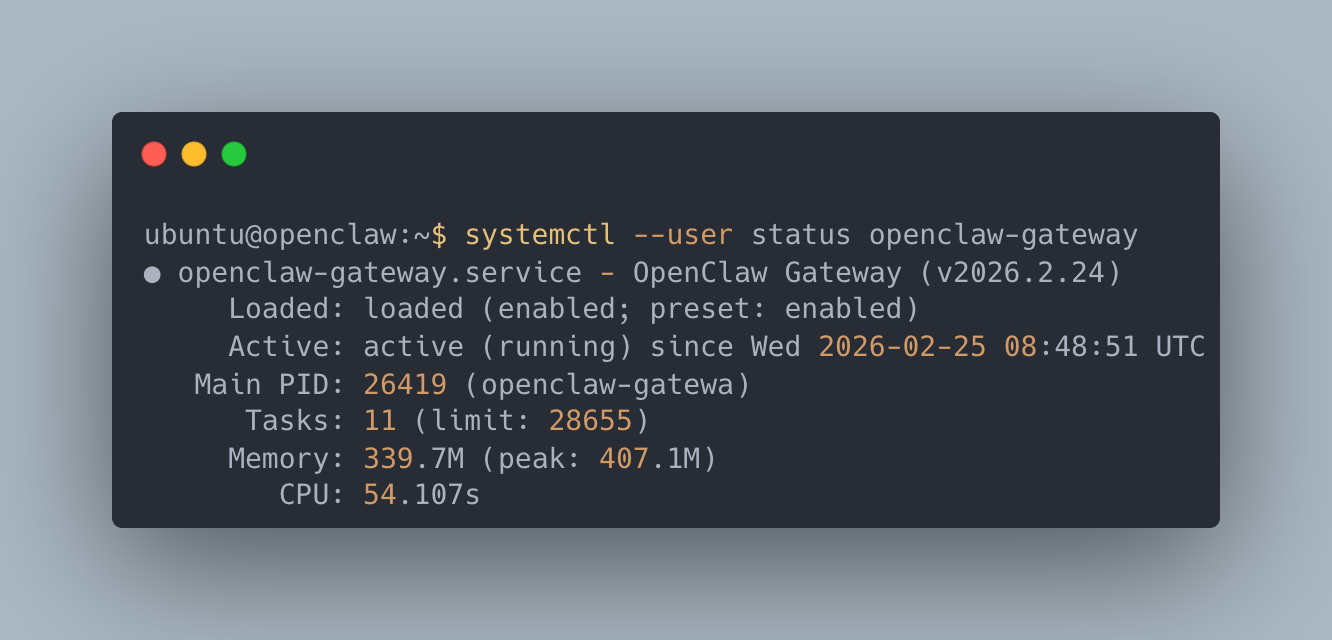
# Install and start as a systemd service
openclaw daemon install
openclaw daemon startVerify the Gateway is running.
openclaw daemon statusIf the output shows active (running), you're all set.
Accessing the Dashboard
Since the Gateway uses token authentication, first retrieve the dashboard URL with the token.
# Run on the server (in your SSH session)
openclaw dashboard --no-open
You'll see a URL like this:
Dashboard URL: http://127.0.0.1:18789/#token=xxxxxxxxxxxxxxxx
Next, open a separate terminal on your local machine and create an SSH tunnel.
# Run from a separate terminal on your local machine
ssh -L 18789:localhost:18789 openclaw-oracle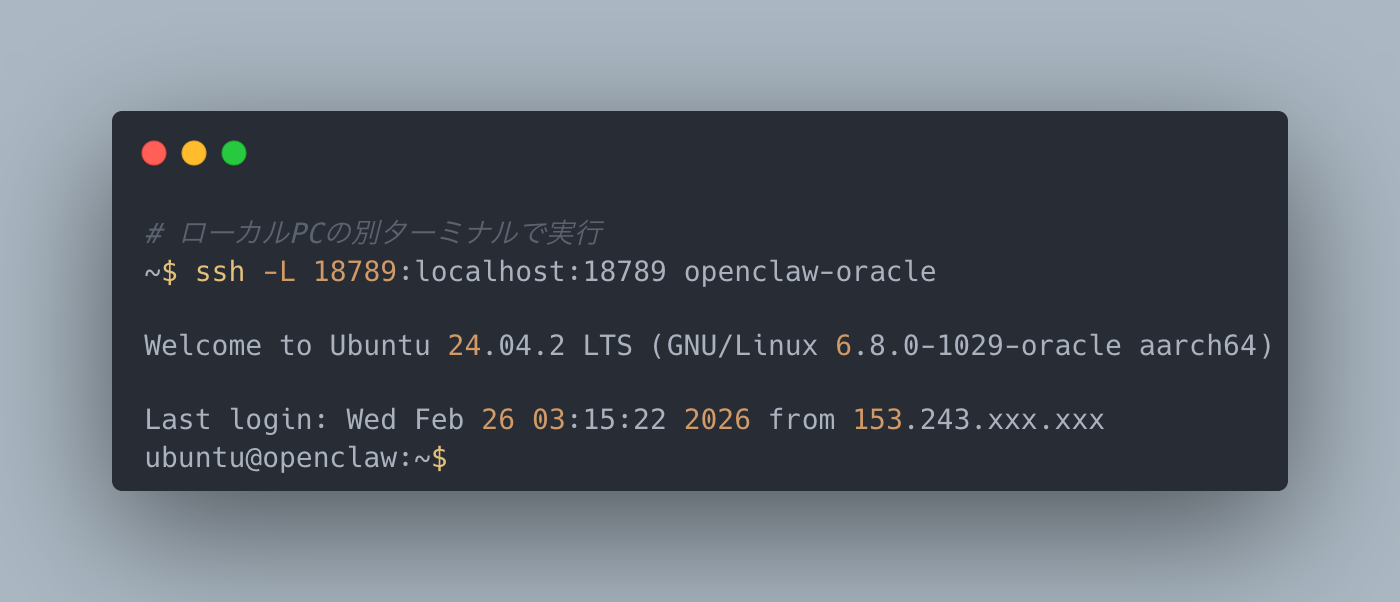
Open the token URL (http://127.0.0.1:18789/#token=...) in your browser to access the OpenClaw Control dashboard.
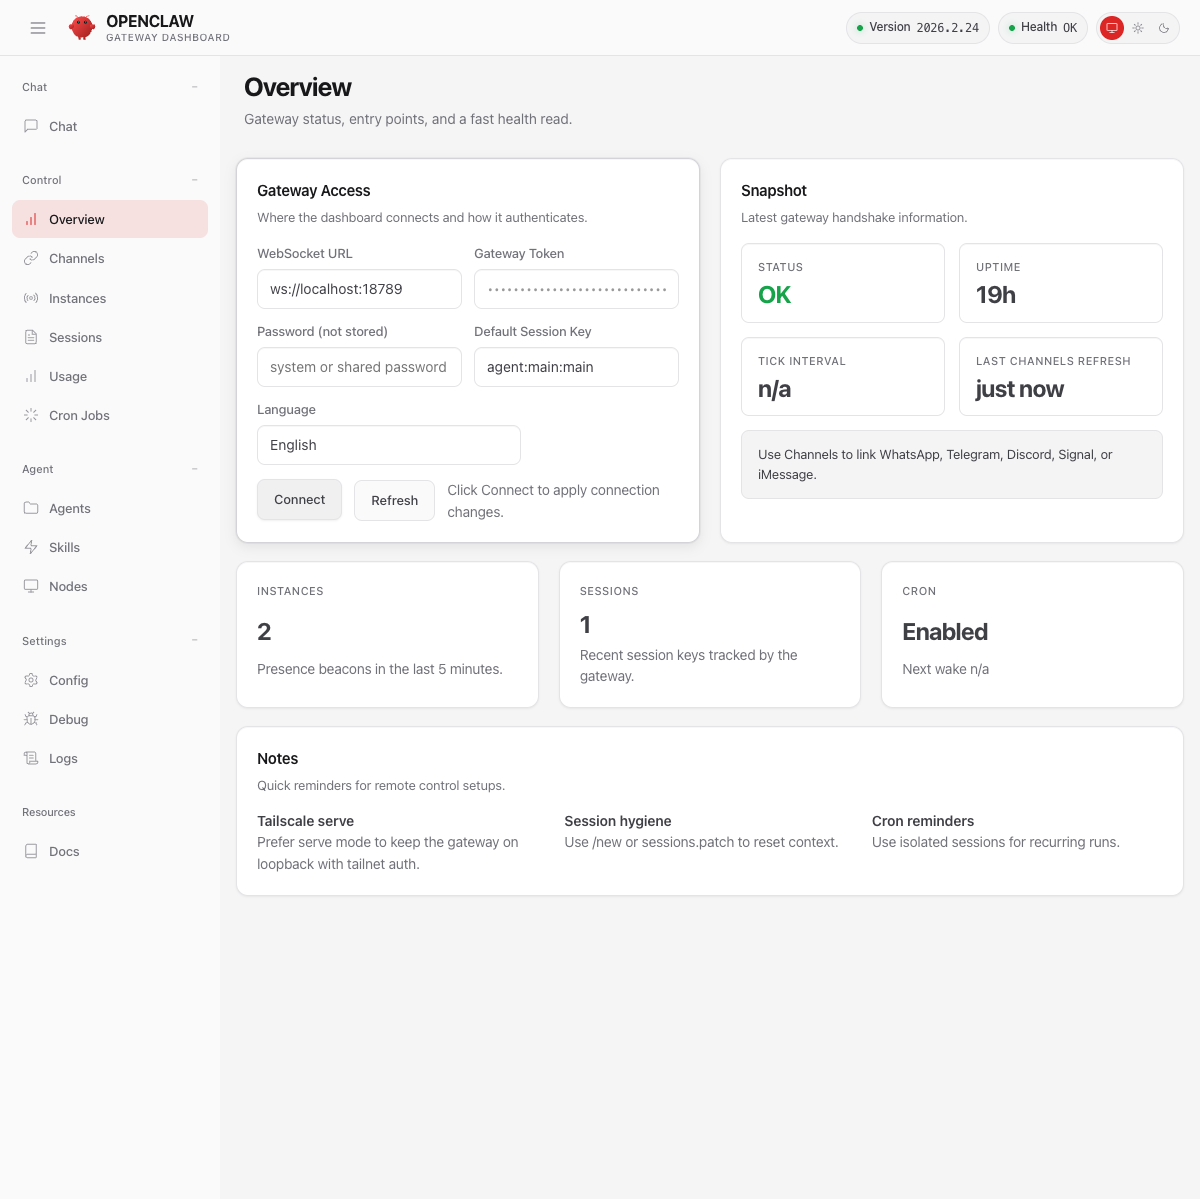
If the Status shows OK, the Gateway connection is working properly.
Bonus: For Those Less Comfortable with the Terminal
Everything from Step 6 onward — SSH connection, OpenClaw installation, Gateway setup — can actually be automated using Claude Code.
Claude Code is Anthropic's AI coding assistant that runs in the terminal. It can execute commands on remote servers via SSH, so you can simply ask:
Install OpenClaw on my openclaw-oracle SSH host
and set up the Gateway.
Claude Code will SSH into the server and handle everything — system updates, OpenClaw installation, Gateway configuration and startup — automatically. In fact, the screenshots in this article were captured by Claude Code.
If you're not comfortable with terminal commands, give it a try.
For advanced users: You could potentially automate the Oracle Cloud account creation and instance provisioning (Steps 1-5) as well. Claude Code has Playwright (a browser automation tool) capabilities for interacting with web UIs. Feed it this article and ask "Reproduce these steps with Playwright" — it might be able to automate even the browser-based portions. Give it a shot if you're interested.
Coming up next: Vol.2 will cover dashboard usage, LLM API key configuration, and Slack / LINE integration in detail.
Summary
In this article, we set up an OpenClaw runtime environment using Oracle Cloud's free tier — from account registration through OpenClaw installation and startup.
Actual time investment:
- Account creation to instance creation (stopped by Out of capacity): ~30 minutes
- PAYG upgrade wait: Several hours to half a day
- Post-upgrade retry to OpenClaw running: ~30 minutes
Key takeaways:
- Oracle Cloud's Always Free tier provides 4 CPU cores and 24 GB of memory — permanently free
- No Mac mini needed — run OpenClaw at zero cost
- "Out of capacity" is the biggest hurdle — Upgrading to Pay As You Go gives you priority (I succeeded on my very first retry)
- PAYG preserves Always Free pricing. Budget alerts provide additional peace of mind
- OpenClaw installation itself takes just a few commands
Coming Next — Mastering OpenClaw
The server is up. But the fun really starts here. Vol.2 will cover how to chat with AI through OpenClaw's dashboard, LLM API key configuration, and practical workflows with Slack / LINE integration. Stay tuned.
At ZenChAIne, we develop solutions powered by AI agents. For AI adoption inquiries, feel free to reach out through our contact page.